 efistu.com Home Decor
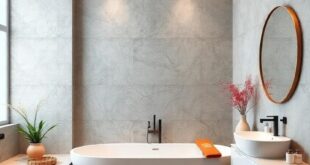
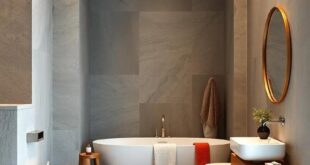
In the realm of home design, the bathroom often plays second fiddle to more prominent spaces like the living room or kitchen. However, a small bathroom holds endless potential for creativity and innovation, serving as a personal oasis of style and comfort. With the right design choices, particularly when it comes to wall tiles, you can transform this compact area into a visually stunning retreat that feels both spacious and inviting. Whether you are looking to make a bold statement with vibrant colors or seeking to create an illusion of space with clever patterns, the selection of tiles plays a pivotal role in defining your bathroom’s character. In this article, we will explore an array of ingenious wall tile ideas that not only maximize the functionality of small spaces but also elevate your bathroom’s aesthetic appeal. Get ready to embark on a journey to redefine your sanctuary—one tile at a time.
Elevate Your Space with Vertical Stripes to Create Illusion of Height in Small Bathrooms
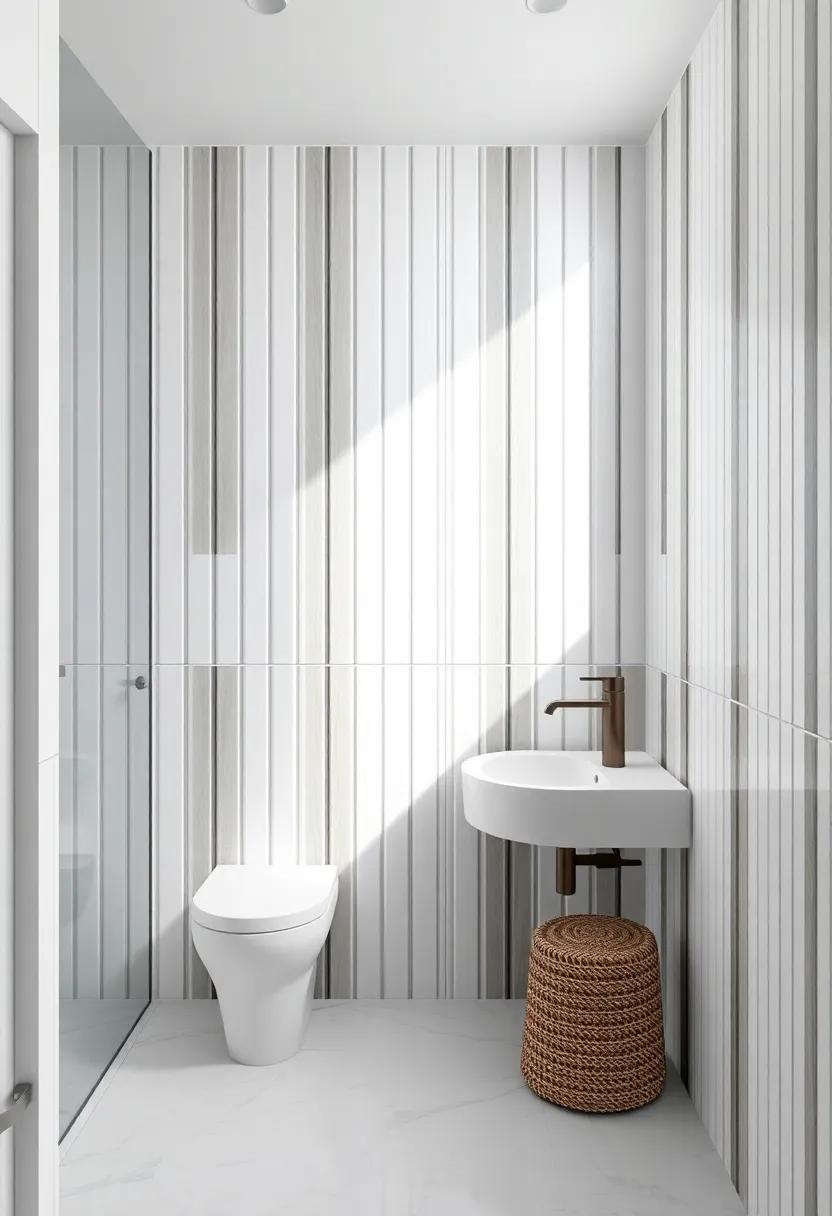
When it comes to optimizing the visual space in your small bathroom, one of the most effective techniques is the use of vertical stripes. Thes sleek lines guide the eye upwards,creating an illusion of height that can make even the coziest bathrooms feel more expansive. Incorporating vertical stripes into your wall tiles can enhance the overall aesthetic while also contributing to a sense of grandeur.Pairing these tiles with a light color palette can amplify this effect, reflecting light and further opening up the space.
To achieve the best results with vertical stripe patterns, consider the following design elements:
- Tile Size: Opt for narrow, elongated tiles to reinforce the verticality.
- Color Contrast: Play with contrasting shades,like a soft white paired with deep navy stripes for a striking look.
- Texture Variation: Incorporate textured tiles or gloss finishes to enhance visual interest while maintaining the illusion of height.
- Accent Features: Use vertical stripes on a feature wall while keeping other walls solid to maintain balance.
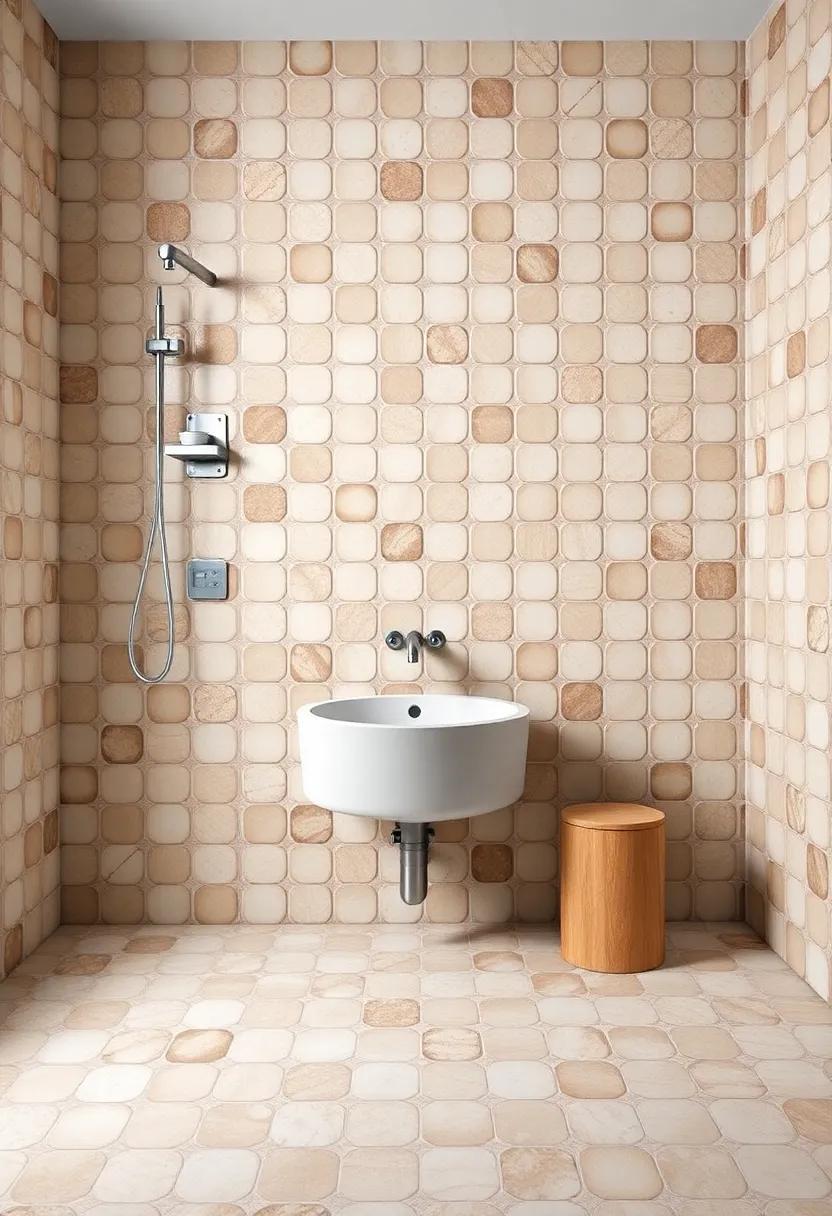
Incorporating Mosaic Tiles for a Pop of Color and Unique Texture in Minimalist Bathrooms

Adding mosaic tiles to a minimalist bathroom not only infuses a splash of color but also introduces a captivating texture that elevates the overall aesthetic. Consider employing a bold mosaic as a feature wall behind the sink or in the shower area, drawing the eye and creating a stunning focal point. Opt for a variety of shapes and sizes in your tiles—think hexagons, triangles, or even hand-cut pieces—to enhance the visual interest without overwhelming the space. Pairing these vibrant mosaics with a muted color palette allows the tiles to shine while maintaining the serene vibe characteristic of minimalist designs.
For an effective integration,you can use mosaics in various formats such as traditional square tiles or intricate patterns that resemble art. Here are some ideas to consider:
- Colorful Insets: Incorporate small insets of mosaic tiles within larger, neutral tiles for a subtle yet dynamic effect.
- Border Accents: Frame your mirror or vanity with a mosaic tile border that adds depth and detail.
- Shower Niches: Create a stunning shower niche accentuated with vibrant mosaics, making practical use of the space while showcasing style.
Exploring Geometric Patterns to Add Visual Interest and Modern Flair in Compact Areas
Incorporating geometric patterns into your small bathroom can transform the entire space, creating a sense of elegance and modernity. By opting for tiles that feature bold shapes and vibrant colors,you can create eye-catching focal points that draw the eye and make the room feel larger than it is indeed.Consider designs such as:
- Hexagonal Tiles: These versatile tiles can be arranged in numerous layouts, providing a stunning 3D effect.
- Chevron Patterns: Arranging tiles in a chevron pattern can elongate walls, giving an illusion of height.
- Subway-Style Layouts: Classic and chic, stacking subway tiles in a herringbone pattern adds depth while maintaining simplicity.
When selecting geometric tiles, always keep scale in mind to avoid overwhelming the compact area. A well-considered contrast between tile sizes—such as using large format tiles on one wall and smaller patterned tiles on another—can create a delightful visual interplay. You can also experiment with color gradients within geometric designs that flow seamlessly to enhance the sense of space. Here’s a quick reference to help you visualize different patterns:
| Tile Style | Visual Effect | Space Impact |
|---|---|---|
| Hexagonal | Dynamic and intriguing | Encourages movement, visually expands |
| Circular | Soft, welcoming | Softens edges, creates a cozy atmosphere |
| Diamond | Stylish and bold | heightens verticality, elongates appearance |
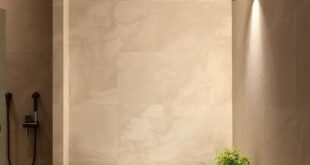
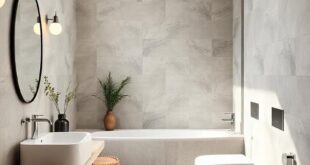
Light Reflective Tiles: Amplifying Natural Light in Your Small Bathroom Design
Choosing light reflective tiles can dramatically enhance the perception of space in a small bathroom. These tiles work wonders by bouncing natural light around, creating a more spacious and airy atmosphere. Consider materials like glossy ceramic, glass, or porcelain that feature high-reflective qualities. These surfaces not only add elegance but also serve as a practical solution to make your bathroom feel larger. When thinking about color, opt for brighter shades like whites, light grays, or soft pastels, as they will maximize light reflection and create a soothing surroundings.
Incorporating strategic tile layouts can further play off the reflective properties of these materials to enhance the effect. For example, using tiles in a herringbone or vertical stripe pattern can lead the eye upwards, making the ceiling feel higher. additionally, consider the use of a mosaic backsplash above the sink; it can serve as a striking visual focal point while still maintaining a light and open feel. To illustrate some inspiring ideas, here’s a table comparing reflective tile options:
| Tile Type | Reflective Quality | Best Color Options |
|---|---|---|
| Glossy Ceramic | Moderate | white, Light Gray |
| Glass | High | Transparent, Pastels |
| Porcelain | High | Matte or Glazed |
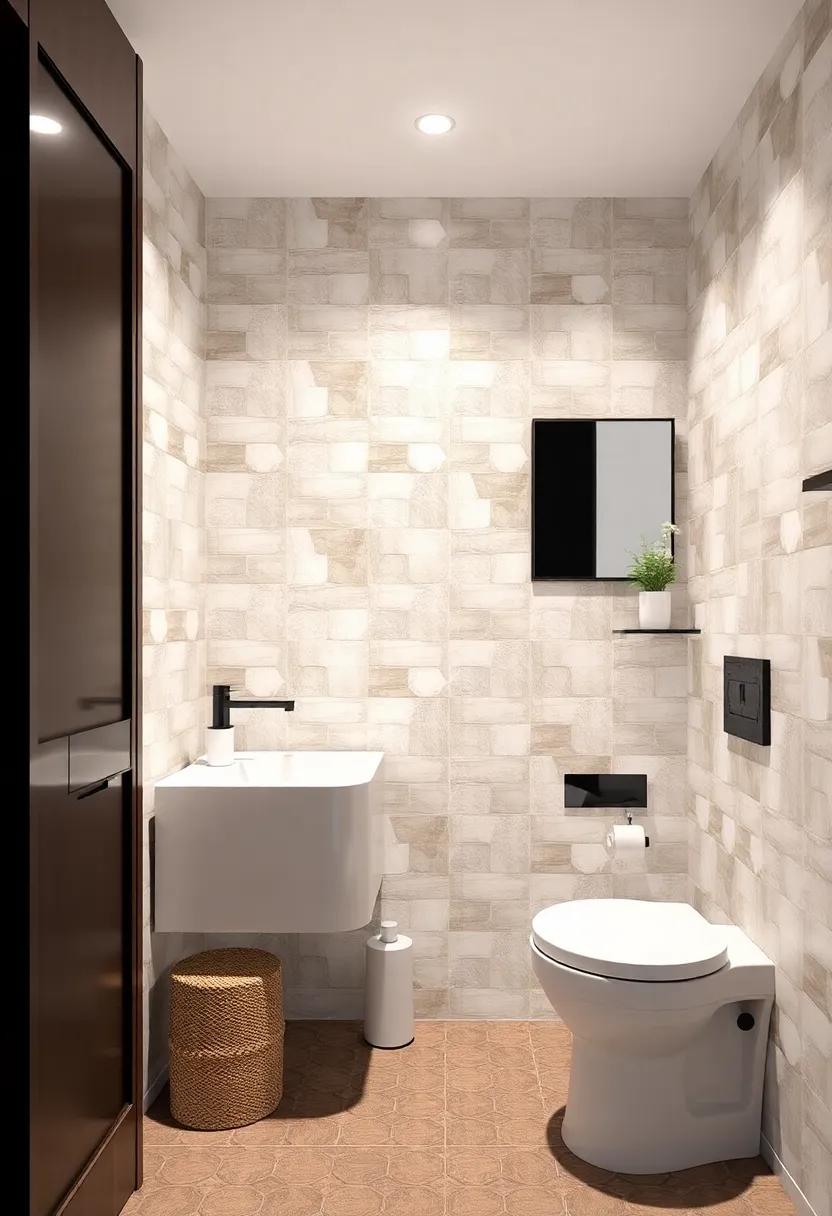
Crafting a Spa-Like Atmosphere with Soft, Earthy Tones and Textured Wall Tiles
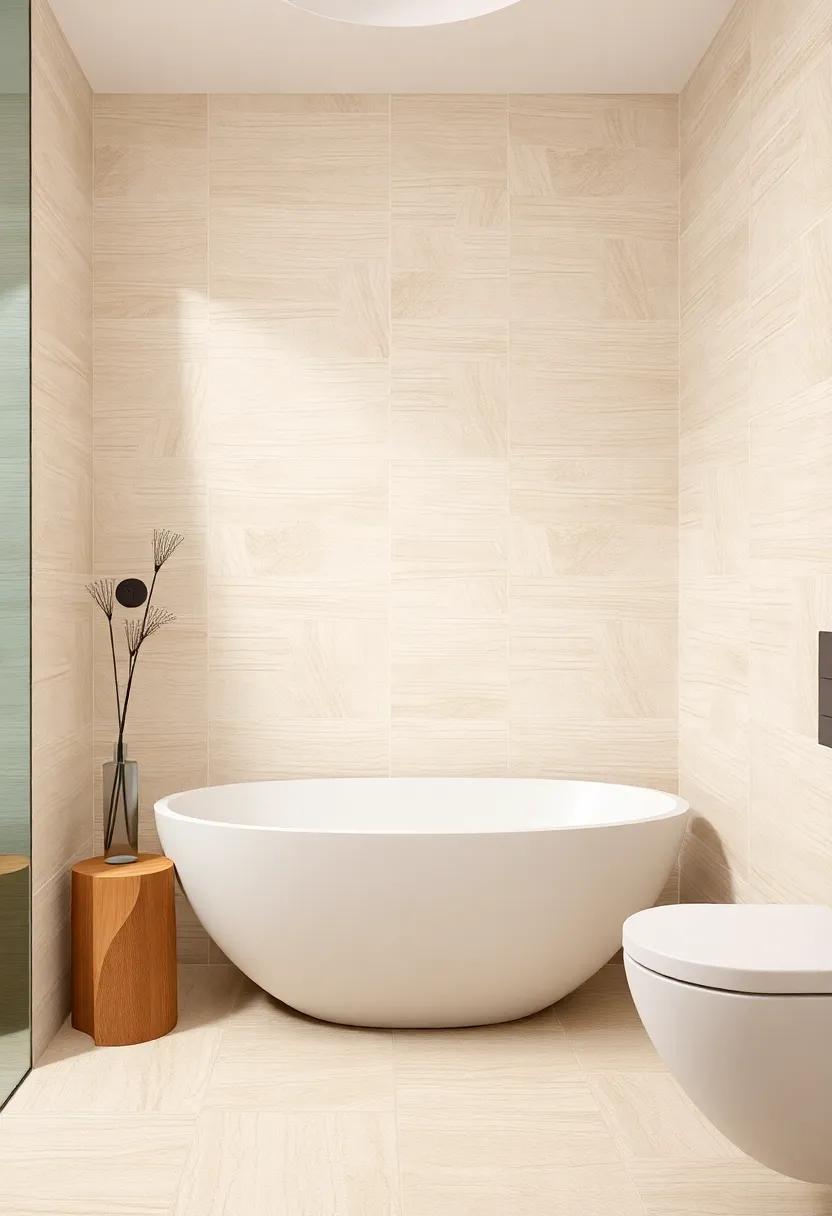
To create a serene,spa-like retreat within your small bathroom,consider incorporating soft,earthy tones that evoke tranquility. Shades like sage green, warm beige, and muted taupe can turn an ordinary space into a calming oasis. Pair these colors with textured wall tiles to add depth and interest. opt for tiles with a natural finish or subtle patterns,as they mimic the organic beauty of stone and wood while remaining practical for bathrooms. This combination not only enhances the aesthetic but also provides a sensory experience, enveloping you in a soothing environment.
Along with color selection, the placement of the textured wall tiles can considerably contribute to your bathroom’s ambiance. Here are a few creative ideas to consider:
- Accent Walls: Create a focal point by using textured tiles on one wall, perhaps behind the sink or the shower area.
- Half-Tiled Walls: Apply tiles to the lower half of the walls for a stylish wainscoting effect that adds dimension without overwhelming the space.
- Overlay Techniques: layer different types of textured tiles to create unique patterns,capturing the eye while maintaining a cohesive look.
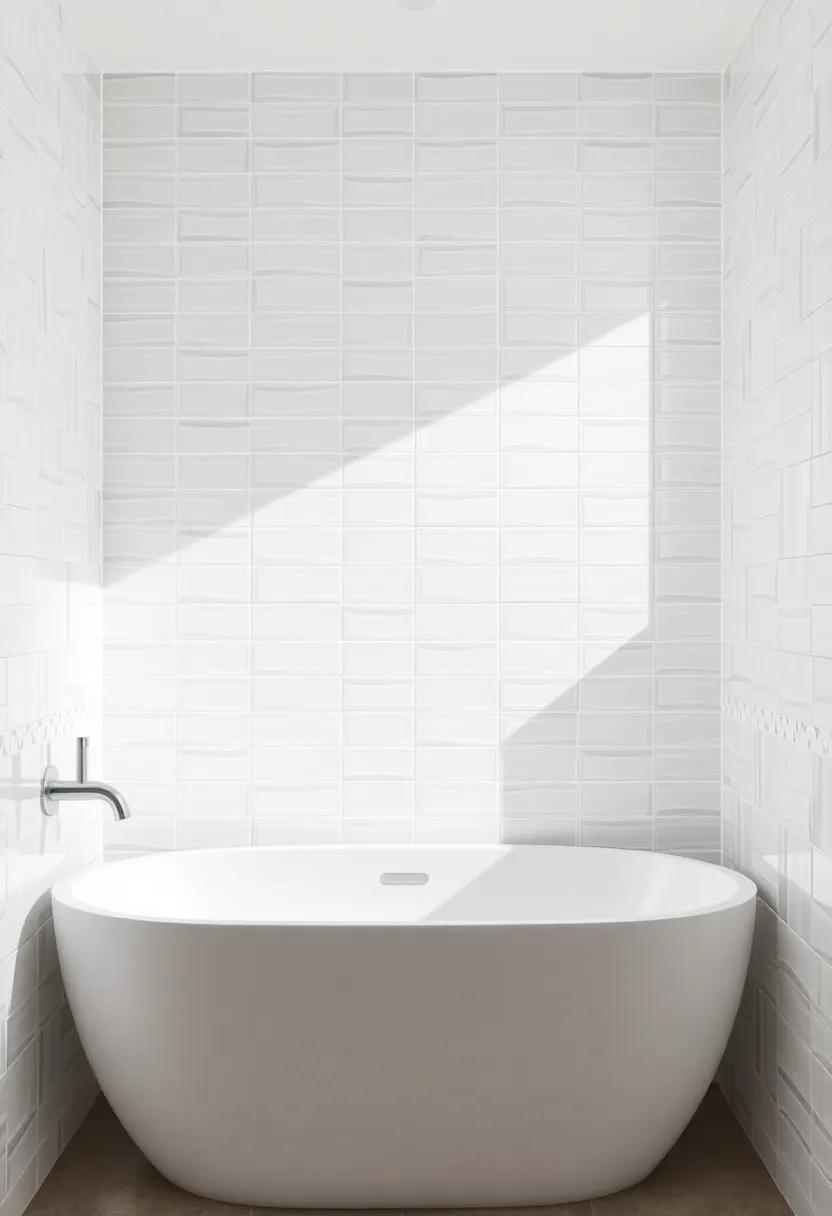
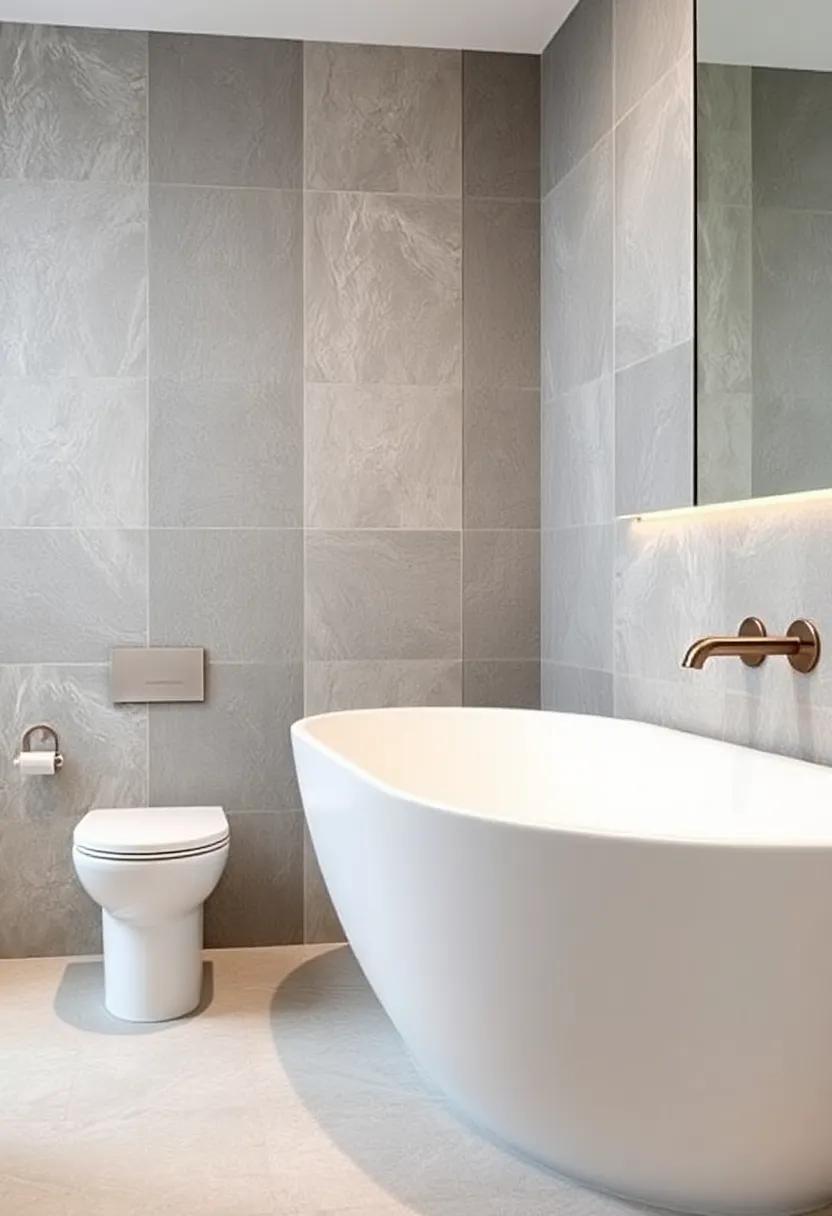
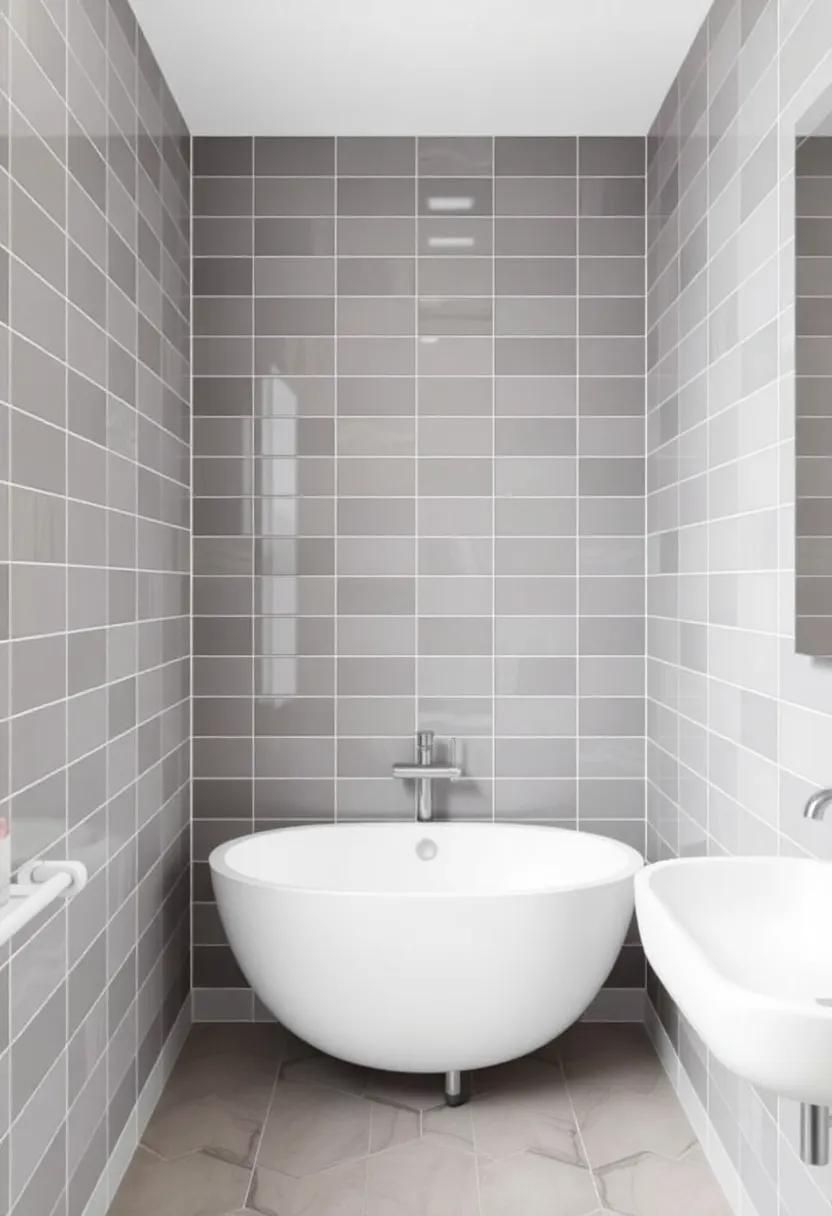
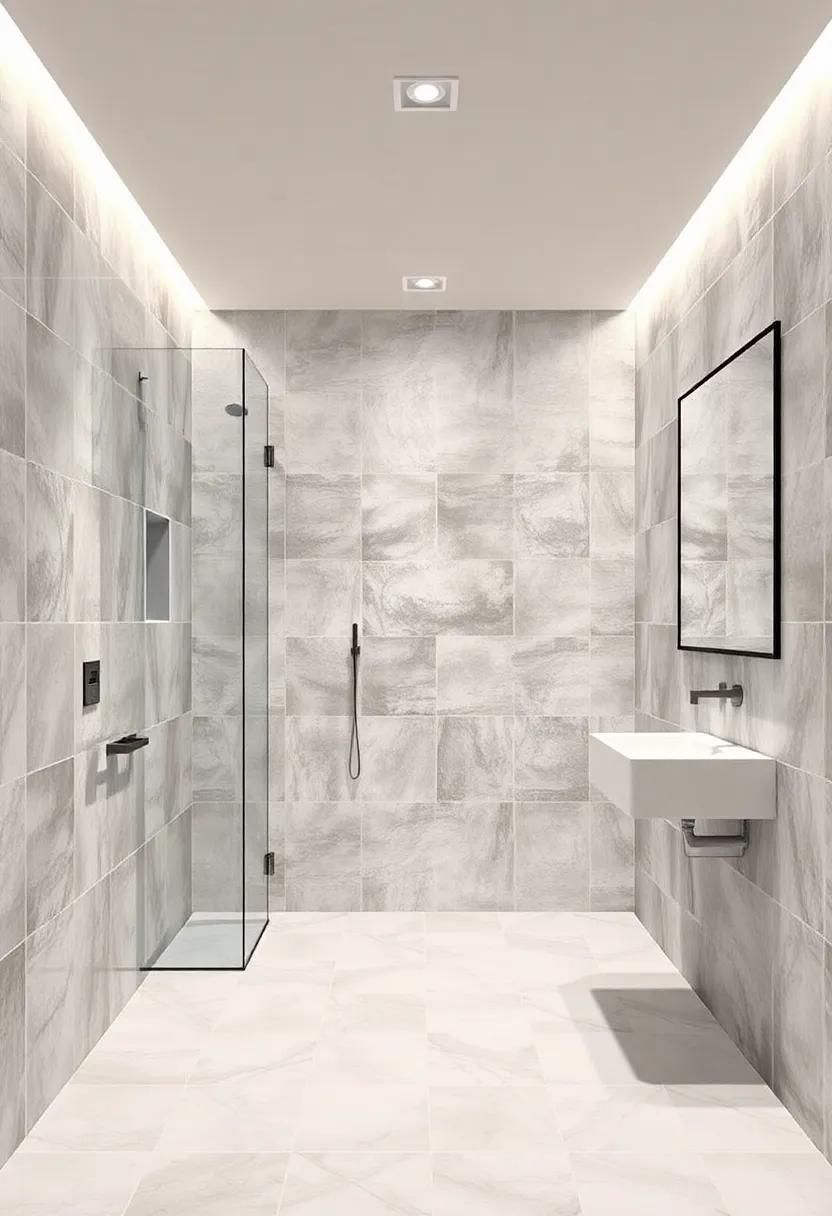
Using Large Format Tiles to minimize Grout Lines and Enhance the Illusion of Space

Large format tiles are a game-changer when it comes to designing smaller bathrooms. by using tiles that are larger in size, you create fewer grout lines, which not only leads to a sleeker, more streamlined appearance but also helps to enhance the illusion of space. When light reflects off the expansive surfaces, it can make the room feel more open and airy. This is particularly beneficial in tight quarters where every visual trick counts.Opt for rectangular or square tiles that can be staggered, or consider using oversized rectangular tiles laid horizontally to draw the eye across the room. Here are some additional benefits:
- Fewer grout lines reduce visual clutter.
- Easy maintenance with minimal grout means less scrubbing.
- Modern aesthetic complements contemporary designs.
When selecting large format tiles, colors and finishes play an equally notable role. Light-colored tiles can brighten up the space, while glossy finishes reflect light, amplifying the spacious feel. Installing tiles from floor to ceiling further elongates the vertical space, creating a seamless flow that tricks the eye into perceiving a larger area. Pairing these tiles with strategically placed mirrors can enhance this effect even more. Consider the following options when choosing your tile layout:
| tile Style | Color | Finish |
|---|---|---|
| Rectangular | Light Gray | Glossy |
| Square | soft Beige | Matte |
| Large plank | White | Polished |
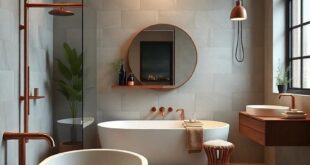
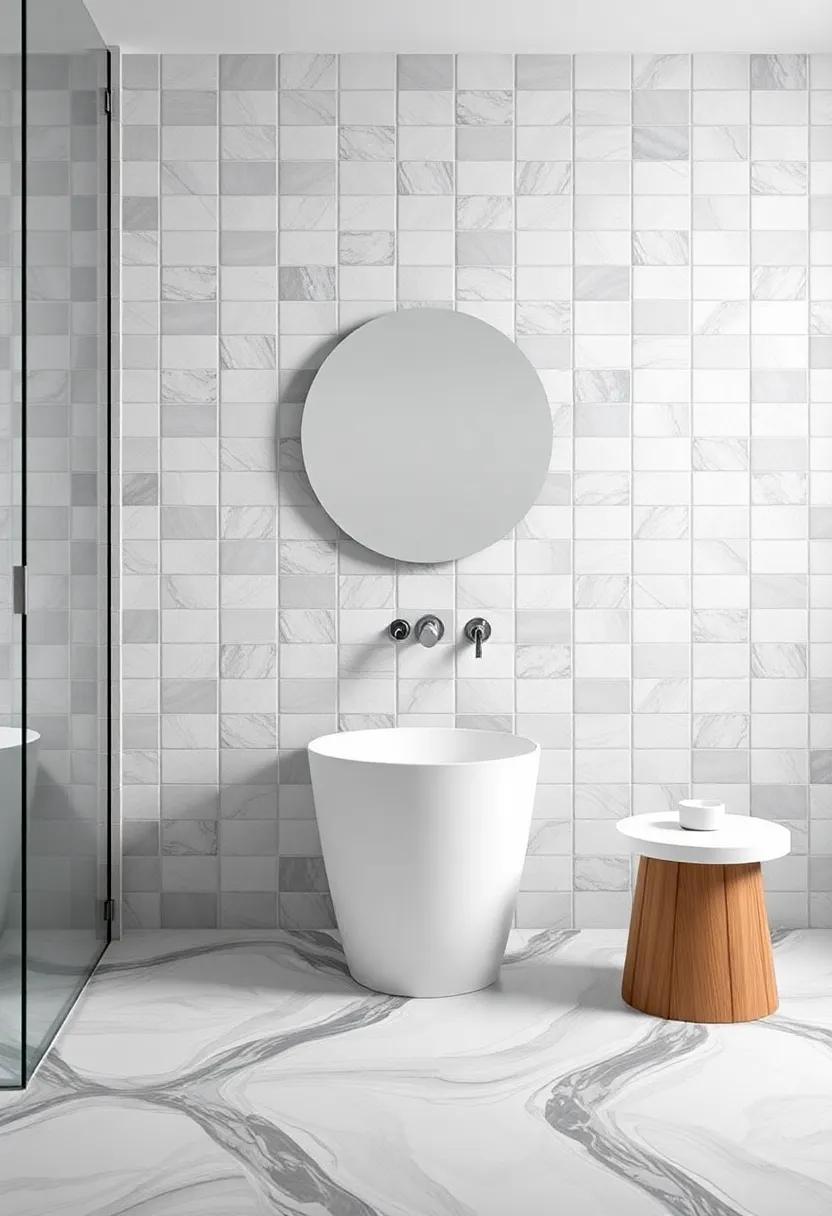
Mixing Materials: combining Stone and Ceramic for a Luxe bathroom Feel
combining the natural elegance of stone with the sleek finish of ceramic creates a harmonious balance that can elevate the ambiance of your bathroom. When choosing your tiles, consider the color palette and texture of each material to enhance the overall aesthetic. As a notable example,pairing creamy marble tiles with glossy ceramic wall tiles can introduce a sophisticated contrast,making the space feel both upscale and inviting. Incorporating different shapes, such as elongated hexagonal stone tiles alongside square ceramic tiles, can add visual interest while maximizing space.
To create a cohesive look, consider the following tips when mixing these materials:
- Color Coordination: Ensure that the colors of your selected stone and ceramic tiles complement each other.
- pattern Variation: use geometric patterns or mixed layouts to maintain a dynamic feel without overwhelming the senses.
- Texture Play: Balance the roughness of stone with the smoothness of ceramic for a more engaging experience.
Here’s a simple guide to help you visualize your combinations:
| Material | Texture | Ideal Colors | Recommended Patterns |
|---|---|---|---|
| Marble Stone | Smooth | Whites, Greys | Chevron |
| Porcelain Ceramic | Glossy | Soft Pastels, Neutrals | Subway Tile |
| Limestone | Rough | Beige, Taupe | Herringbone |
The Power of Color: Choosing aquatic Hues to Bring Serenity to Your Bathroom
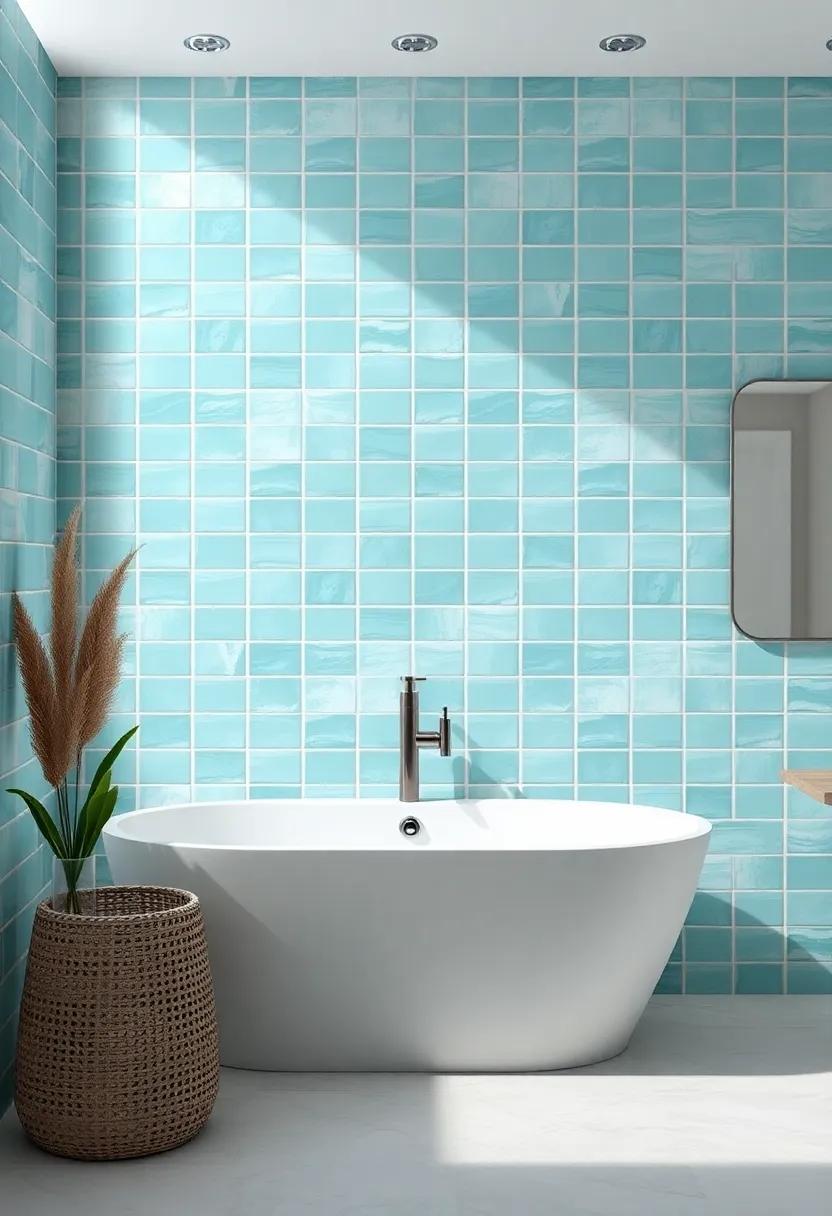
Incorporating aquatic hues into your bathroom can create a tranquil oasis, combining aesthetics with a sense of calm. Shades like seafoam green, soft aqua, and deep turquoise evoke the soothing essence of water, making your small space feel larger and more inviting. When selecting tiles, consider the following options to maximize both style and sensation:
- Glossy Finishes: Reflective tiles can enhance light, giving the illusion of expanded space.
- Gradient Patterns: Gradually shifting shades can create a mesmerizing effect, drawing the eye upwards.
- Accent Walls: Use a bold aquatic color on one wall to anchor the design without overwhelming the entire room.
When paired with complementary elements, aquatic colors transform the ambiance of your bathroom. A palette of blues can be beautifully accented with natural wood or crisp white, providing a balanced contrast that enhances serenity. Consider creating visual interest with a simple tile layout, where different shades of aquatics can be arranged in a staggered pattern:
| Tile Style | Color Option | Benefits |
|---|---|---|
| Glossy Subway Tiles | Light Aqua | Reflects light for a brighter space |
| Mosaic Tiles | Seafoam Green | Adds texture and vibrancy |
| Matte Finish Square Tiles | Deep Turquoise | Modern and sophisticated appearance |
Statement Wall Designs: creating Focal Points with Bold Tile Arrangements
One of the most effective ways to draw attention to a specific area in your bathroom is through the strategic use of bold tile designs. by selecting vibrant colors or unique patterns for your wall tiles, you can craft a stunning focal point that elevates the entire space, even in a small setting. Consider employing geometric designs or large-format tiles to create a sense of depth, making your walls feel more expansive. When combined with a contrasting color scheme on the other walls, this method not only adds visual interest but also brings a modern flair to your bathroom.
Another approach involves creating an accent wall with a variety of tiles arranged in an eye-catching manner. For example, incorporating mosaic tiles into your design can add texture and personality, while different shapes can create a captivating visual rhythm. Here are a few ideas to inspire your tile arrangement:
- vertical Stripes: Draw the eye upward to create the illusion of height.
- Patchwork style: Combine various tile styles to showcase your creativity.
- Diagonal Layout: A diagonal pattern can make walls appear larger.
Consider the finish of your tiles as well; matte tiles can lend a sophisticated look while glossy tiles brighten the space with reflective qualities. To help visualize different arrangements, here’s a quick comparison table of tile options:
| tile Type | Visual Effect | Best Used In |
|---|---|---|
| Glossy | Reflective and Bright | Small, Low-Light Bathrooms |
| Matte | soft and Warm | Minimalist Designs |
| Mosaic | Textured and Playful | Accent Walls or Artistic Touches |
By thoughtfully selecting and arranging your tiles, you can transform any small bathroom into a sophisticated sanctuary that maximizes both space and style.
Accent Tiles: Adding Character with Strategic Pops of Bold Patterns
Incorporating accent tiles into your small bathroom design can create an eye-catching focal point that transforms an otherwise understated space. By selecting bold patterns or vibrant colors as accent features, you can draw attention to specific areas, making the bathroom feel both lively and spacious. Consider using accent tiles in unexpected places, such as the back of a niche shower shelf or as a border around a mirror. This subtle yet strategic placement can enhance visual interest while maintaining balance in the overall design.
When choosing accent tiles, it’s essential to think about the color scheme and patterns that resonate with your style. Here are some effective ideas for incorporating accent tiles in a small bathroom:
- Geometric patterns: opt for tiles with bold shapes to create a modern feel.
- Bright Colors: Use vibrant blues or greens to add energy and freshness.
- Textured Finishes: Combine smooth wall tiles with textured accent pieces for depth.
- Artistic Murals: Consider a mural-style placement for a shocking splash of creativity.
| Pattern/Color | Effect |
|---|---|
| Chevron | Dynamic movement |
| Floral | Soft elegance |
| Hexagonal | Modern interest |
| Marble | Timeless luxury |
Adventurous Tile Shapes: Hexagons and Arches for a unique Spatial Experience
Embrace the beauty of geometric design with hexagonal tiles that bring a contemporary touch to your small bathroom. Their unique shape allows for creative layouts that can enhance the perception of space. By opting for large hexagons, you create fewer grout lines, promoting a seamless appearance that visually expands the area.Consider using a bold color palette or a mix of matte and glossy finishes to create a dynamic contrast that adds depth and interest. You can also play with the orientation, laying hexagons in a herringbone or honeycomb pattern to make a statement that draws the eye and adds character.
Arched tiles provide a softer,more organic aesthetic,offering a playful alternative to traditional shapes. These curved designs can soften the overall décor while providing an artistic flair. By incorporating arched tiles in niches or accent areas, like around mirrors or vanities, you can create an inviting focal point that transitions effortlessly between different zones of the room.Utilize a palette of muted tones or earthy colors to promote a sense of calm and spaciousness, while varying the size of the tiles can add visual texture and intrigue. Whether used separately or in conjunction with hexagonal tiles, these adventurous shapes can transform your bathroom into a uniquely styled retreat.
Textured Tiles: Incorporating 3D Elements for Depth and Interest in Small Spaces
When it comes to maximizing space in small bathrooms, textured tiles offer an innovative solution to create depth and visual interest. 3D tiles can transform flat surfaces into dynamic canvases,making them perfect for accent walls or as a striking backsplash behind sinks. Consider experimenting with a variety of patterns, such as geometric designs, wavy forms, or even scaled textures that mimic organic materials. By combining different shapes and finishes, you can enhance the overall aesthetic of your bathroom, drawing the eye and captivating guests. Positioning these tiles thoughtfully can also help create the illusion of height and spaciousness, allowing your small sanctuary to shine.
Moreover,choosing the right color palette is essential for maximizing the impact of textured tiles. Light, neutral tones can definitely help reflect light, making the space feel larger, while darker shades can add sophistication and richness. Here are some ideas to effectively incorporate 3D elements in your small bathroom:
- Accent Wall: Use textured tiles on a single wall to create a focal point.
- Shower Niche: Integrate 3D tiles into your shower niche for a unique display.
- Vertical Pattern: Install tiles in a vertical layout to elongate the perception of height.
- Mixed Tiles: combine smooth and textured tiles for a striking contrast.
Here’s a quick comparison of tile materials that can add texture to your small bathroom:
| Tile Material | Texture Type | Visual Effect |
|---|---|---|
| Ceramic | Glossy | Bright and Reflective |
| Natural Stone | Rugged | Warm and Earthy |
| glass | Shiny | Elegant and Light-Reflecting |
| concrete | Textured | Industrial Chic |
Upcycling Vintage Tiles: Blending Old World Charm with Contemporary Style
Upcycling vintage tiles can transform your bathroom from ordinary to remarkable, infusing it with a touch of history and elegance. By carefully selecting tiles that showcase intricate patterns and muted colors, you can create a stunning focal point on your walls. This method not only showcases the beauty of aged materials but also promotes sustainable design practices. Consider incorporating these stunning features:
- Patchwork Patterns: Combine different vintage tiles to create a colorful patchwork design that draws the eye.
- Accent walls: Use a single type of vintage tile as an accent wall, making the space feel cozy yet sophisticated.
- Mixed Materials: Pair vintage tiles with modern fixtures and materials for a chic contrast that highlights both styles.
Along with aesthetics, upcycling offers practical benefits. It’s a *sustainable approach* that minimizes waste and embraces a unique story with every tile. To maximize the limited space in small bathrooms, consider layout options that play with verticality. A herringbone pattern or horizontal stacking can elongate the visual lines,making the room appear larger. Here’s a simple table comparing tile layouts:
| Layout Style | Visual Effect | Ideal Use |
|---|---|---|
| Herringbone | Dynamic and sophisticated | Accent features |
| Vertical Stacking | Creates a height illusion | Small rooms |
| Diagonal Pattern | Wider perception of space | Corner walls |
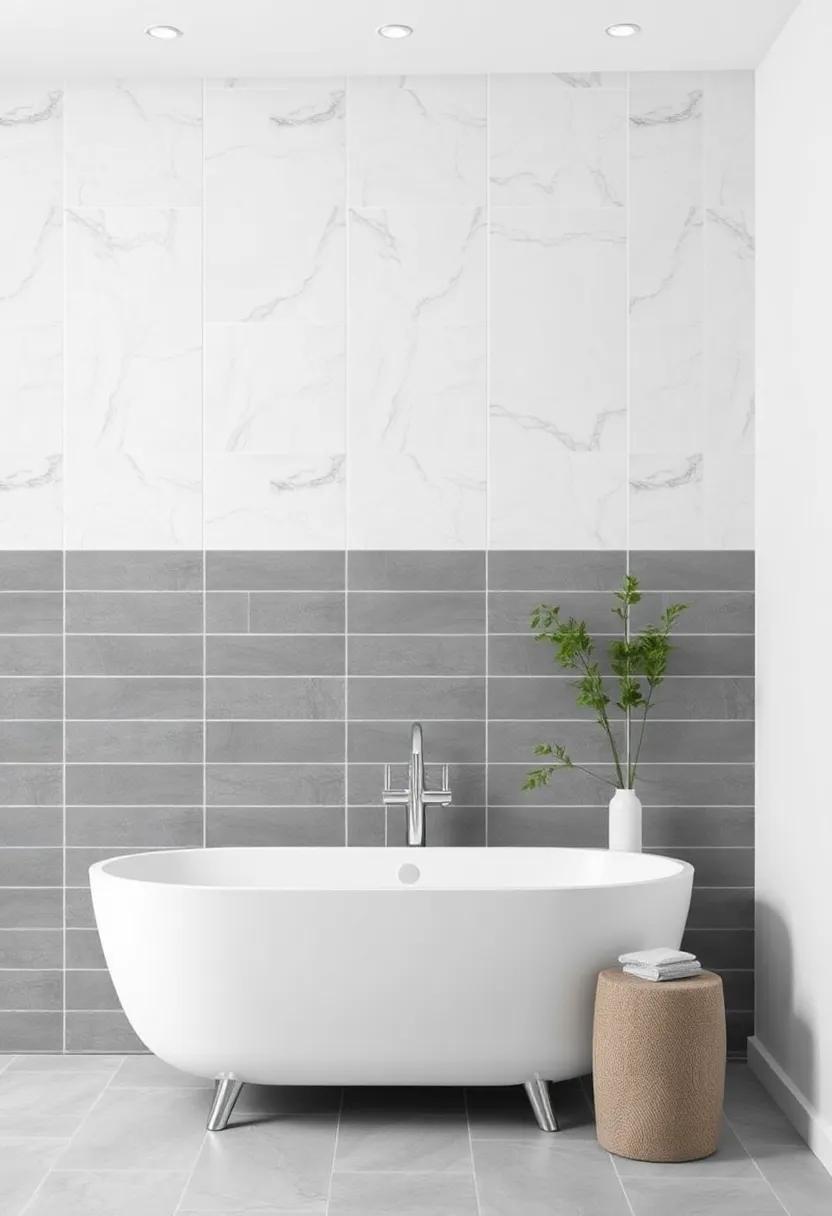
Creating Continuity: Extending Wall Tiles to the Ceiling for Coherence
One of the most effective ways to create a visually cohesive space in a small bathroom is by extending wall tiles all the way to the ceiling. This design technique not only enhances the sense of height in the room but also draws the eye upward, making the space feel larger and more expansive. By using the same tiles throughout the entirety of the wall, you can achieve a seamless flow that contributes significantly to the overall aesthetic. Consider the following benefits:
- Uninterrupted Flow: Maintaining the same tile pattern reduces visual breaks, which can make a small area feel cramped.
- Increased Light Reflection: Utilizing glossy or light-colored tiles on the ceiling and walls can amplify natural light,further enhancing the illusion of space.
- Enhanced Elegance: Reaching up to the ceiling creates a clean and modern look that elevates the bathroom’s overall design.
To add even more interest and character, you can experiment with different tile layouts, such as herringbone or stacked patterns. This innovative approach allows you to customize the feel of your space while retaining the coherence that high-extended tiles provide. Below is a comparison table highlighting various tile layout styles and their visual impact:
| Layout Style | Visual Impact |
|---|---|
| Herringbone | Dynamic and elegant; frequently enough adds depth. |
| Stacked | Sleek and contemporary; emphasizes height. |
| Diagonal | Creates a sense of movement; visually expands the space. |
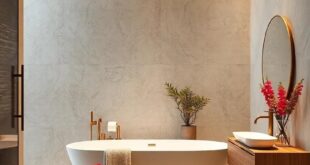
framing views: Using Tiles to Highlight architectural Features and Draw the Eye

Tiles are not just functional; they are an artistic medium that can frame the architectural features of a small bathroom while optimizing visual appeal. By strategically choosing and placing tiles,you can enhance elements like a freestanding tub or a unique shower alcove,allowing them to take center stage. Consider incorporating a bold color palette or textured tiles around these features to create a striking contrast against the rest of the bathroom decor. This technique not only draws the eye but also enriches the overall atmosphere of the space, creating a sense of continuity and elegance.
In addition to color and texture, the pattern and layout of tiles can further articulate the boundaries of your bathroom’s architecture. For instance, using larger tiles on flat surfaces and smaller, detailed designs in niche areas can create a sense of hierarchy and visual interest. Here are a few layout ideas to consider:
- Vertical Stripes – Elongate the space and draw the eye upward.
- Diagonal Patterns – Introduce dynamic energy and movement.
- Accent Borders - Frame specific areas and highlight unique fixtures.
Additionally, consider a stunning tile feature wall as a captivating focal point. You can create a table to visualize tile options that can best complement your design goals:
| Tile Type | best Use | Visual Effect |
|---|---|---|
| Ceramic | Shower Area | Classic & Timeless |
| Glass | Accent Walls | Light Reflective & Bright |
| Porcelain | Flooring | Durable & Elegant |
| Subway | backsplash | Modern & Clean |
Using this array of tiles not only helps to enhance your bathroom’s architectural features but also allows for personal expression through design, ensuring your small bathroom is both functional and aesthetically pleasing.
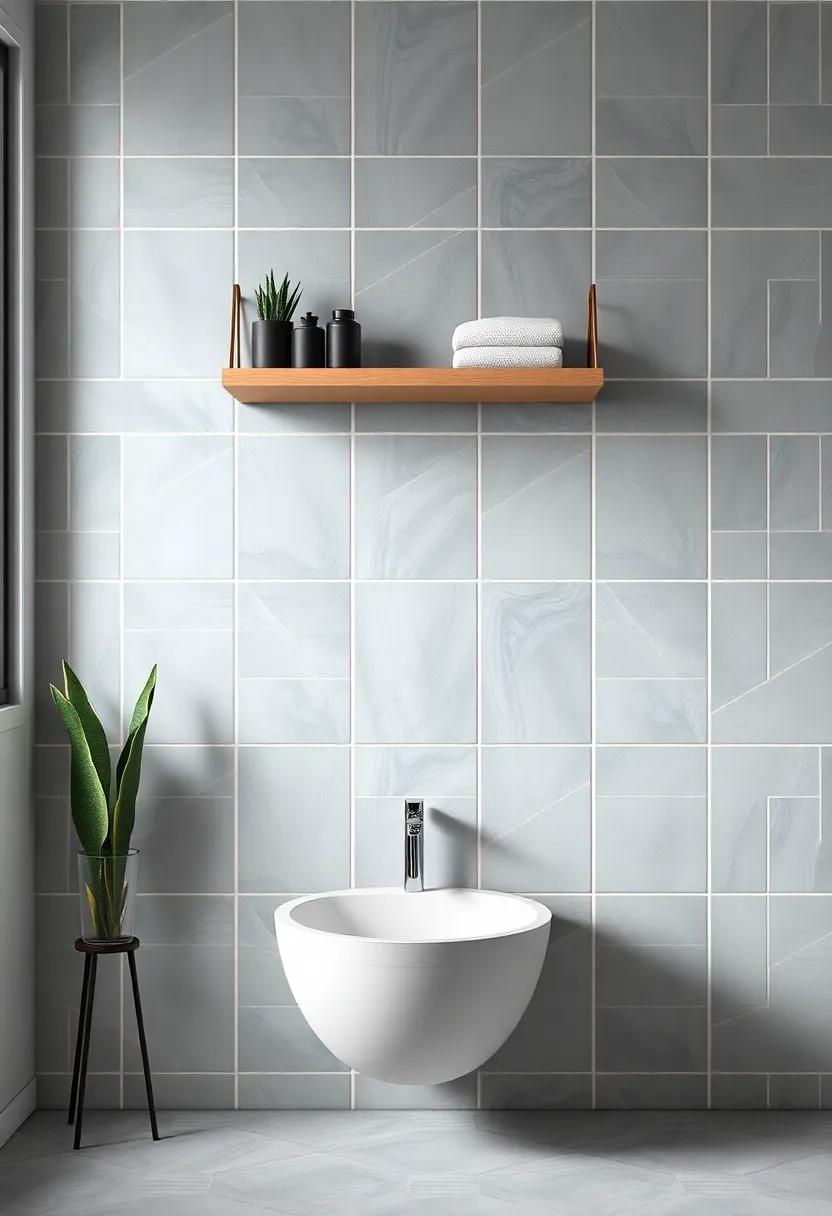
Integrating shelving Solutions with Stylish Wall Tiles for Functional Aesthetics
Incorporating open shelving solutions with stylish wall tiles can elegantly elevate the function and aesthetics of your small bathroom. By utilizing floating shelves or corner shelves,you maximize vertical space while introducing a chic element to your decor. Select tiles in diverse textures and colors to complement the shelving; glossy subway tiles can enhance the brightness of the space, while matted rustic tiles evoke a cozy, spa-like atmosphere. Displaying neatly rolled towels and curated decor on these shelves transforms them into an eye-catching feature,maintaining a balance between practicality and style.
Consider the interplay between your wall tiles and shelving materials. A cohesive design can be achieved by ensuring the colors harmonize: light wood shelves against bold patterned tiles can create an exciting contrast,while black metal shelves paired with monochrome tiles foster a modern industrial feel. To further enhance the functionality,use decorative baskets or glass jars on the shelves to keep essentials organized yet stylish. This thoughtful integration not only maximizes your limited space but also allows for a curated display that reflects your unique taste.
Patterns that flow: Ensure Cohesion While Mixing Various Tile Designs in Your Bathroom
Mixing different tile designs can transform the look of your bathroom without overwhelming the senses. To achieve a harmonious blend, focus on using a consistent color palette across the different tile types. this coudl mean selecting tiles that share complementary shades or playing with varying textures that maintain a cohesive feel. Consider the following strategies:
- Use a dominant tile: Choose one tile design to act as the foundation, using it on the majority of the walls.
- Accent with contrasting tiles: Pair a bold tile choice with subtle, neutral tiles to balance the visual weight.
- Create zones: Use different tile styles in designated areas,such as a colorful backsplash above the sink,while keeping the rest neutral.
Balance and flow are essential when mixing tiles, and an effective way to ensure this is by utilizing grout lines strategically. Align your grout lines for a seamless transition between different designs, as they can act as visual connectors throughout the space. Additionally, consider creating a table of tile sizes and shapes that complement each other for your bathroom design:
| Tile Type | Size | recommended Use |
|---|---|---|
| Subway Tile | 3×6 inches | Walls, Backsplash |
| Mosaic Tiles | 2×2 inches | Shower Floor, Accent Areas |
| Large Format Tiles | 12×24 inches | Feature Walls |
Concluding remarks
As you embark on your journey to transform your small bathroom, remember that every inch matters. the right wall tiles can not only elevate the aesthetics but also create an illusion of space and depth, turning your compact sanctuary into a stylish retreat. Whether you choose bold patterns, reflective surfaces, or subtle textures, your walls have the power to reflect your personal style while maximizing functionality. Embrace creativity and let your bathroom tell a story that combines comfort and elegance. With a blend of innovation and thoughtful design, you can truly redefine your space. So, roll up your sleeves and start reimagining—as even the smallest bathrooms can make a grand statement. Happy tiling!